 The old Boy Scout motto, “Be Prepared,” is a worthy aspiration for any motorcyclist, but it’s especially apropos for anyone riding off-road.
Breaking down on a well-traveled street can certainly be a major inconvenience. But help is available and the bike can be readily hauled away if necessary. Having a disabled motorcycle in the wilderness is a whole different story. There may be no passersby, no cell phone service and no way for a truck to get to your machine to carry it out. And that’s just the bike. If you’re hurt, too, the potential for serious consequences—even death—skyrockets.
This is why carrying tools and first-aid supplies during off-road outings isn’t optional. (It’s also why solo dirt riding is a very bad idea, unless there’s a steady stream of friendly traffic on your route.) So the dual-sport or trail rider is faced with a difficult dilemma: How prepared is enough? One can bring along lots of potentially helpful equipment in backpacks, fanny packs, fender bags, etc. But a load of tools can add a tremendous amount of weight to rider and bike – along with a great deal of bulk – and thereby quickly erode the riding experience in terms of both comfort and maneuverability. It’s quite possible to make a trail ride less safe by lugging too much gear.
The key is efficiency. A savvy off-roader totes only the tools and first-aid supplies that are most likely to be relevant and helpful, given the environment through which they’ll be traveling, their particular bike (KTM riders had better bring that 13mm wrench no one else needs!) and personal physical issues (i.e. a bee-sting allergy or asthma). And a seasoned veteran packs the most compact, lightest weight versions of these things they can find.
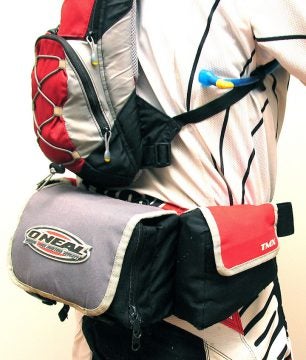
Of course, having a comfortable, functional means of carrying such kit is also vital. For example, if your heavy, tool-laden fanny pack keeps loosening up and inching down over your hips during bouncy, stand-up riding, it’ll be a distraction at best and could interfere with your movement on nasty terrain where body-English is of critical importance. Or, for an inseam-challenged rider wearing thick, heavy boots, a tool bag mounted on the rear fender may foul their leg during every mount and dismount.
So, with all the unique variables involved in any bike/rider/environment combination, few recommendations will apply to everyone. We can, however, suggest some general guidelines to consider when choosing what to take with you when you venture off-road.
Tools, Proper
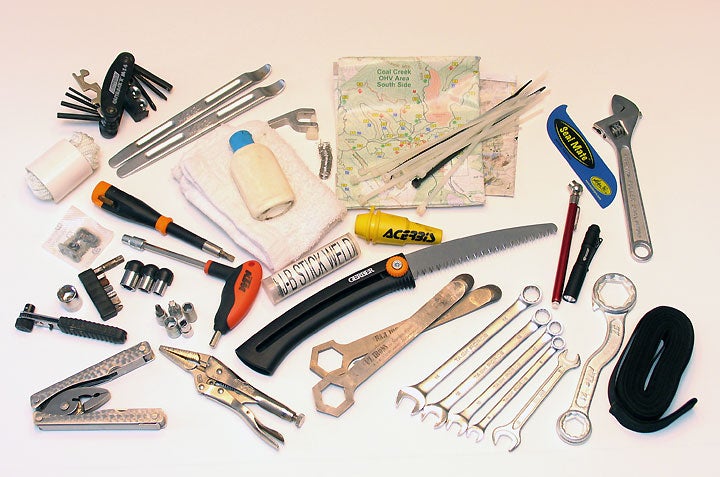
Let’s begin with a limited assortment of wrenches. The vast majority of fasteners on most any dirt bike (from here on, this term will refer to dual-sport as well as purely off-road machinery) require even-numbered metric wrenches from 6mm to 14mm. Those zany Austrians throw in 13mm fasteners, too, as already mentioned, along with some Torx-head bolts. While crescent wrenches will work in most cases, sometimes a socket works much better; it may even be essential in some cramped spaces.
Choose crescents that combine different sizes on the same handle, and double-up on those your bike needs two of – usually 8mm and 10mm pass-through bolts and chain-tension-adjusting bolts that have same-size bolt-heads and nuts. This redundancy can also be achieved with an ultra-compact ratcheting socket-wrench set, a multi-socket T-handle, an adjustable crescent, or a pair of channel-locks or narrow locking “Vice-Grip”-type pliers. Crescents are available in extra-light versions (titanium or drilled handles), though these can be quite pricey. Wrenches should be long enough to offer good leverage, but short enough to fit in your pack.
A small range of hex-key wrenches is also likely necessary, along with a screwdriver. Look for the latter with interchangeable bits, so only one handle must be carried. To remove a wheel or adjust the rear axle’s position, wrenches to fit your particular bike’s axle bolt/nut combinations are required. These can sometimes be found built into the ends of tire irons; such multi-purpose combos save space and weight.
Flats are among the most common off-road maladies. If you can’t fix a flat and must ride back out on a deflated tire, you risk damaging your rim and may not have the control or traction to get through tricky technical sections. To remove a punctured inner tube, you’ll need pack-sized tire irons and some means of lubricating the tire bead. This can be accomplished with an easily stowed piece of soap and some liquid from your personal hydration system (you wouldn’t ride without water, would you?!).
Once out, it may be possible to repair the damaged tube with a rubber patch kit. Or it can be replaced with a spare, though carrying one involves big space and weight penalties. In a pinch (no pun intended), a front tube might substitute for a rear, but not vice-versa. To find the leak or refill the tube, an air pump is necessary. Small hand-operated pumps are available; others utilize compressed CO2 cartridges. Some combine both modes, providing the easy use of the latter and the reliability of the former. A pencil-type air pressure gauge is light and small.
Note: Realistically, trailside flat repair is a very arduous task and requires considerable skill and ingenuity (i.e. you’ve got to find a way to elevate the end of the bike with the flat). If it’s a short distance back to the trailer and the terrain isn’t too difficult, you might want to take your chances with rim damage.
Other tools that may come in handy include a folding saw for cutting branches that block your way, and a multi-tool with knife blades, needle-nose pliers, and other bits to augment your “real” tools. One of our favorite miscellaneous tools is Motion Pro’s Seal Mate. It’s simply a flat, flexible piece of plastic (a section of 35mm film works, too) that allows you to clean out your fork’s dust and oil seals; this is often all that’s needed to stop leakage after debris has worked its way in. Performing this task on the trail maintains proper fork function and prevents coating your front brake rotor with oil (not recommended). Cell phones can be carried in reasonable safety by stowing them near softer items and sealing them in a plastic bag.
Some companies, like Blue Ridge Racing, Pit Posse and CruzTOOLS, sell good quality tool sets with nearly all of the items in this article already assembled. You can even get them pre-packaged in different tool-set/tool-pack combinations. However, you may be better off pulling duplicate tools out of your existing collection first and then buying the individual items you still need. And watch out for “bargain” kits that contain low-grade tools.
Even the best ideas can run aground on unexpected details when put into practice in the real world. Think you’ve got everything you need to execute a particular operation “out there?” Try doing it in your garage first, using only the tools in your pack(s). Oh yeah… Getting to such-and-such requires removing that thing with the weird recessed fastener. Better to realize that at home than miles from nowhere. And, in the case of tire removal, you may decide you’d rather leave your bike in the woods – FOREVER!! If so, you can save yourself the space and weight of the related tools.
 Your Privacy Choices