I really had no complaints about my 2008 KTM 450XCR-W test mule’s carburetion, at least not after jetting and adjusting it for local conditions in my home state of Tennessee. But, as is so often the case, I just couldn’t leave well-enough alone. My local KTM guru advised that even better throttle response could be obtained with a couple of easy mods to the KTM’s Keihin FCR carburetor, and added that mixture adjustments could be made much more convenient with a third.
Keihin’s FCR carburetors come fitted on a wide variety of dirt and dual-sport bikes, not just those from KTM. Various engines may respond differently to the modifications that follow, so it’s best to check with your own local expert regarding your particular machine. Nevertheless, I think the principles below have broad applicability.
R&D Flex-Jet
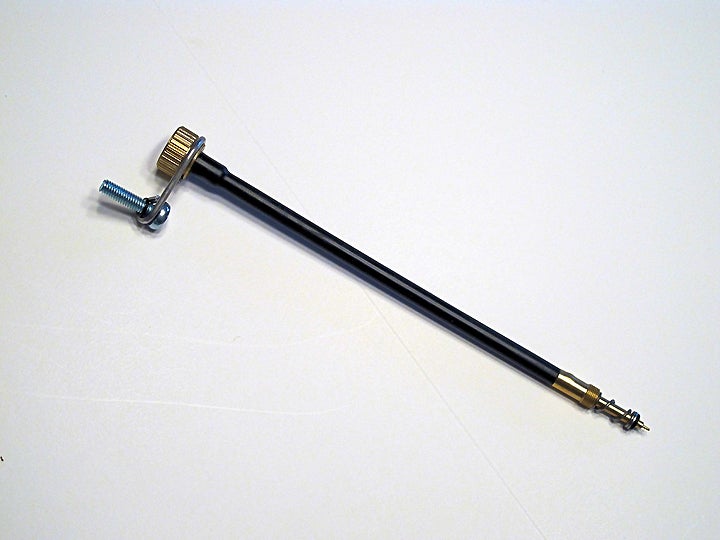
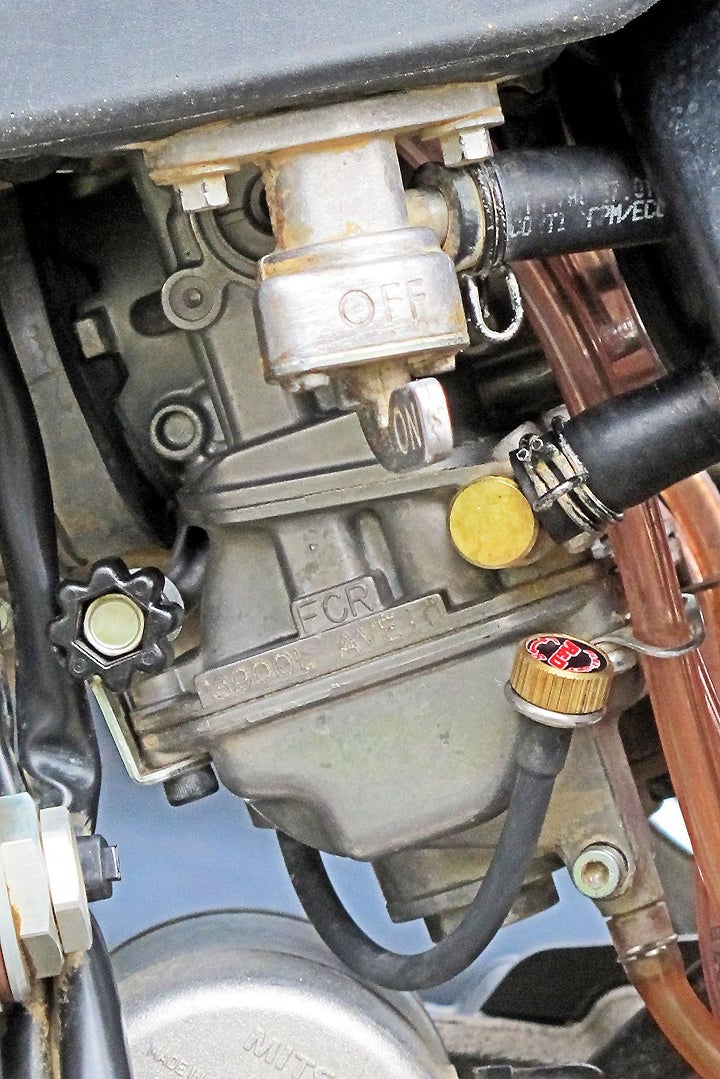
Most anyone with an FCR carb will benefit from the convenience mod, regardless of whether they do either performance mod, so I’ll begin with R&D’s Flex-Jet. The fuel screw on FCR carbs resides face-down in front of the float bowl, making it difficult or impossible to access with a screwdriver on most motorcycles. On some, it might be possible to use a special tool that turns a tiny screwdriver bit at a right angle from the handle assembly. Such tools are pricey, though, and don’t fit in fanny packs. On our 450XCR-W, there wasn’t enough clearance to use such a tool anyway. Even small/routine adjustments for altitude and temperature shifts required almost completely removing the carb–a major hassle!
While technically not a performance mod, the Flex-Jet makes it easy to optimize mixture for varying altitudes and temperatures, allowing you to keep your bike running its best through changing conditions. And it’s more resistant to vibration-induced rotation than the stocker. The fuel screw has the most influence on mixture during the first 25% of throttle opening, but continues to make a contribution throughout the entire range. Given that a lot of trail riding is done with light throttle, having this screw set properly can make a significant difference in power and rideability.
Less expensive alternatives are available if your have enough clearance underneath your carb. Several companies make replacements for the stock screw that simply extend straight down and have a finger-operated wheel at the bottom. I chose the Flex-Jet because I didn’t want to wedge my fingers into a very cramped, hot engine bay.
Accelerator Pump Diaphragm Swap
The more directly performance-oriented mods involve changes to the accelerator pump, which shoots a fixed-duration burst of extra fuel into the carb throat when the throttle is opened further from any position; it’s especially useful when the throttle is opened quickly at low rpm and the engine may take a long time to reach the rev “target” set by the new throttle position. This squirt fills in the fueling “gap” created by the associated drop in air speed through the carb, which becomes momentarily inadequate to pull enough fuel up through the jets. Theoretically, the accelerator pump’s squirt should end as the air speed “catches up” and can draw fuel properly from the jets.
According to my guru, the stock pump on my KTM delivered a two-second squirt; I’ve read that many carbs are set to squirt for three seconds. That may not sound like much, but successfully negotiating tight, technical terrain can require numerous throttle adjustments over the course of several seconds, and it’s possible to end up with an overly rich mixture right when you need the crispest response. That pump could be squirting fuel against a closed slide, instead of into the gaping maw of a wide open carb throat. Or, revs could have built quickly enough that air speed would be pulling the optimal amount of fuel through the jets long before the squirt expired, netting a rich excess.
My solution to this problem actually came from Honda.The plunger-shaped diaphragm from Honda’s accelerator pump rebuild kit (Honda part #16021-MEB-771) can be exchanged for the one that came stock in KTM’s carb. Doing so reduces the squirt duration from two seconds to one, greatly limiting the potential for generating an overly rich mixture with rapid-fire throttle adjustments. I’ve detected no downside to the briefer squirt, but have instead noticed a more precise connection between my wrist and the bike’s rear wheel. This is a subtle improvement, but one that boosts control and confidence.
A different diaphragm may be best for your bike/riding style. There is no “correct” duration for the squirt. Too brief will result in a lean condition (and possible piston damage), while too long may create a rich condition–either of which will yield decreased power, a bog, stumble or outright stall. The optimal squirt duration will keep you in between those two extremes for the vast majority of your riding time, and will depend on your machinery and your riding habits.
Off-roading typically involves the use of low gears, lots of wheel-spin, and only rare sudden transitions from extremely small to extremely large throttle openings. All of these make relatively brief squirt durations preferable because they all allow rpm to catch up to throttle position quickly, shortening the lag between throttle twist and the restoration of adequate air speed through the carb. Hence, what’s ideal for woods racing may be too brief for motocross, and would create dangerously lean conditions for a dual-sport rider who whacks–and holds–the throttle wide open from low rpm, in high gear, with zero wheel-spin, on the street. In that situation, it may be many seconds before revs (and air speed through the carb) catch up with throttle position.
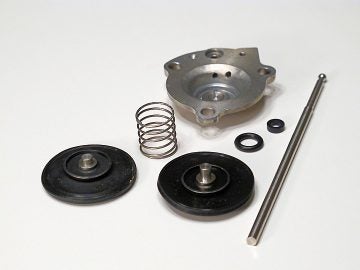
There are a variety of diaphragms available from Honda (and Yamaha), each with a slightly different height post (see photo). The longer the post, the less range/duration of motion. Selecting the best option requires accurate assessment of your needs. If you ride more aggressively (higher revs, more wheel-spin), and have a bike with copious power, you’ll benefit from a relatively shorter squirt. Casual riding on a modestly powered bike will require a longer squirt.
Installation is a simple matter of unbolting the pump cover, popping the old diaphragm out, dropping the new one in, and bolting it all back together. I searched in vain for a listing of all the options, hoping to supply a comprehensive chart showing the squirt durations of different post heights, with their part numbers. Consult a trusted mechanic or check internet forums specific to your bike.
There are other ways to modify accelerator pump squirt duration, but this one was among the simplest to understand and employ, and it was the one favored by my expert. After researching the options, you may select a different means to the same end.
Boyesen QuickShot 2
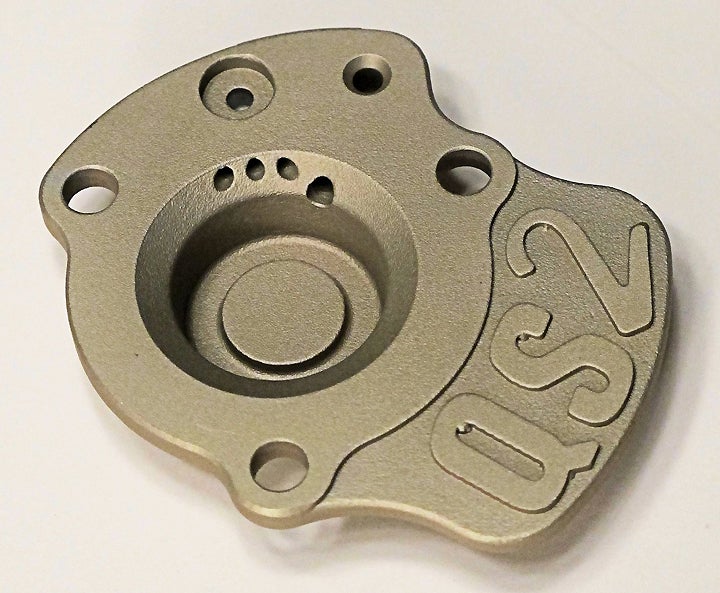
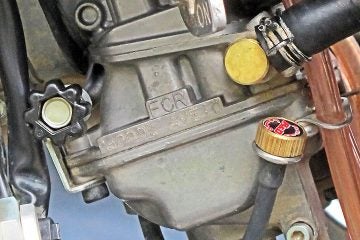
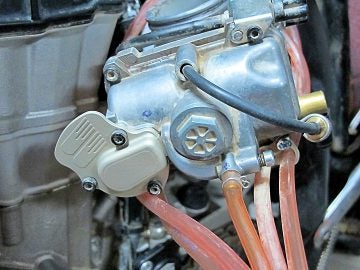
Boyesen is a well-established leader in the intake system aftermarket. Their QuickShot 2 bolts on in place of the stock accelerator pump cover. This is a single piece with no moving parts. Its magic arrives via additional venting that whisks away any air that sneaks into the accelerator pump’s reservoir–something that can happen when a carb is subjected to vibration (read: when used most anywhere off-road). With the QuickShot 2 in place, the accelerator pump will consistently squirt a full “dose” of fuel when activated rather than sometimes starting with an air bubble (think of a partially filled syringe that has been inverted, but not yet had the air squeezed out). Reservoir refilling speed may also be enhanced.
Just as there are options for changing diaphragm movement, there are more ways to manage reservoir filling, including other brands of accelerator pump covers (some much less expensive than the Boyesen listed here), and covers that incorporate something called a “leak jet.” Again, I went with the recommendation of someone who has tuned many bikes like ours for local conditions. I suggest that you use this information to get your own research going, rather than as one-size-fits-all recommendations.
One more caveat: At first I thought I’d made things worse, as the bike stalled when the throttle was whacked open–with no load on the engine (e.g. in neutral). For these mods to work properly, the bike must actually be ridden, with the engine under load. It would make sense that, if the accelerator pump is now delivering a more potent shot right from the start of its action, and the engine is also revving freely toward the throttle position target, the combined effect would yield redundant fueling from the jets and the pump, creating an immediately over-rich condition that yields a stall.
But, overall, I’m delighted with the improved carburetion supplied by the mods I made. The bike is more fun to ride because it feels more energetic and more obedient, and I can now fine-tune mixture with an infinitesimally small fraction of the effort required beforehand. These gains weren’t exactly cheap, and I can’t say how subtle or dramatic they’d be on your machine, but I can tell you I consider them worthwhile on my KTM. And–once the carb was pulled off–installing them was quick and easy.
Flex-Jet, $32.95
R&D, 11419 Bombardier, Norwalk, CA 90650
Phone: 562-864-8218
Website: www.r1dean.com
Accelerator pump rebuild kit, Honda part #16021-MEB-771, $24
See you local Honda dealer
Boyesen QuickShot 2, $95.95-$99.95
Boyesen
8 Rhoades Rd.
Lenhartsville, PA 19534
Phone: 610-756-6818
www.boyesen.com
 Your Privacy Choices