Circular Logic
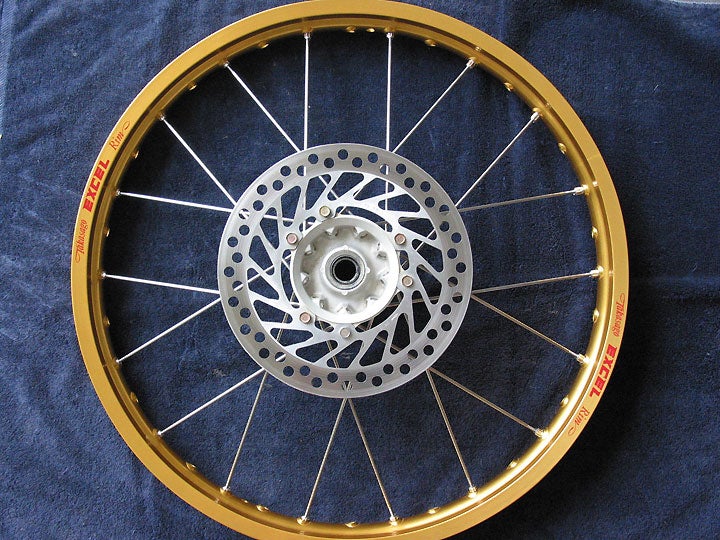
Chances are, the rim you’re working with is currently very close to perfectly round. Your job is to keep it that way while tightening all those spokes, any one of which is capable of distorting your rim’s shape in either of two dimensions. You see, spokes are incredibly strong devices. Their real strength is in the form of pulling, rather than pushing, even though that may run contrary to intuition. Spokes do not support the hub from underneath so much as suspend it from above. Think about it. Which would be stronger, a single spoke extending from the hub downward to the rim, or that same spoke extending upward? Would it be easier to bend the spoke below or tear the spoke above? Now it’s obvious, right? A metal spoke is much more vulnerable to bending than tearing. Tremendous tension can be brought to bear on the rim by tightening spokes, enough to deform a very strong loop of steel or alloy into a wobbly 3-D ovoid, obviously out of round in both vertical and lateral planes. Don’t ask us how we know. You can avoid this painfully embarrassing fate if you heed our advice.
Start by getting all the nipples much closer to snug. Again, you may have to figure out what’s possible by trial-and-error. On our example, we could get all the nipples tightened to the last visible thread on each spoke before any tension was applied to the rim. We arrived at this formula by meticulously tightening every spoke on the wheel the same number of turns, time after time. Time consuming, yes, but ultimately it saved time because we didn’t end up with one side of the rim pulled in closer to the hub than the other side before we even started the truing process. Then we’d have had to start backing off the nipples on the close side so we could tighten the nipples opposite them across the wheel; and without any reference standard to go by, it would have been very difficult to make them all the same. Remember, the definition of a circle is a line with all points equidistant from a central point and lying in the same plane. It’s better to avoid pulling the wheel out of round from the beginning, instead of correcting deviations afterwards.
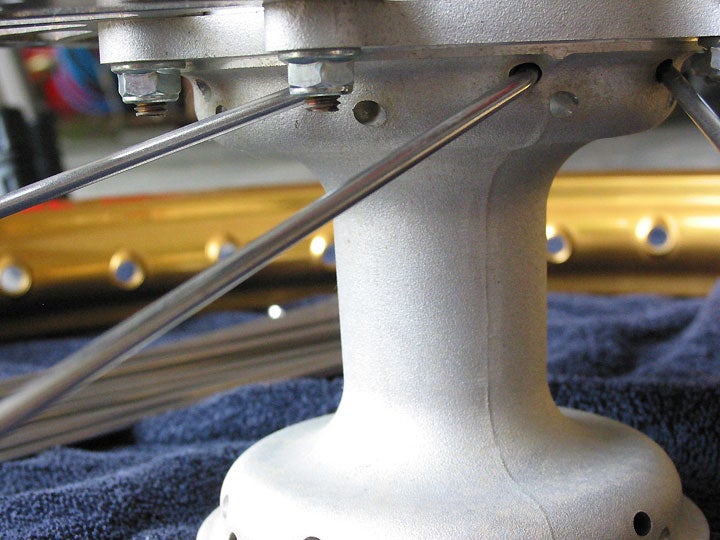
Now, with all the nipples the same distance up on the spokes, the wheel will be much closer to rigid, but there should still be no tension among the spokes. When you lift it up, it should hold its shape, but still jingle just a tiny bit. Depending on your wheel’s design, you may notice that even with all the nipples perfectly the same on their respective spokes, some are closer to the rim than others. This may be because of variations in spoke length or their placement radially on the hub. For example, if all the outer spokes (furthest from the axial centerline) are also a little closer to the edge of the hub’s flange, they will protrude further through the wheel unless they compensate for this difference in hub mounting position by being slightly shorter than the inner spokes. If you find such a discrepancy between spoke subgroups, carefully adjust the looser ones in small increments, just as you did with all the spokes at the start of this tightening process, until they have just as little slack as the spokes that were initially closer to snug.
NOTE: If you are only performing a tune-up on your wheels, rather than building them, you should be removing all existing tension by loosening the nipples on your spokes. Just as in the instructions above, go all the way around the wheel multiple times, making your adjustments in small increments, and repeating the process until all the nipples turn easily and all the spokes emit a dull, “dead” sound when tapped with your spoke wrench. (Tap a few tight ones before starting, to hear the bright “ping” of a taut spoke.)
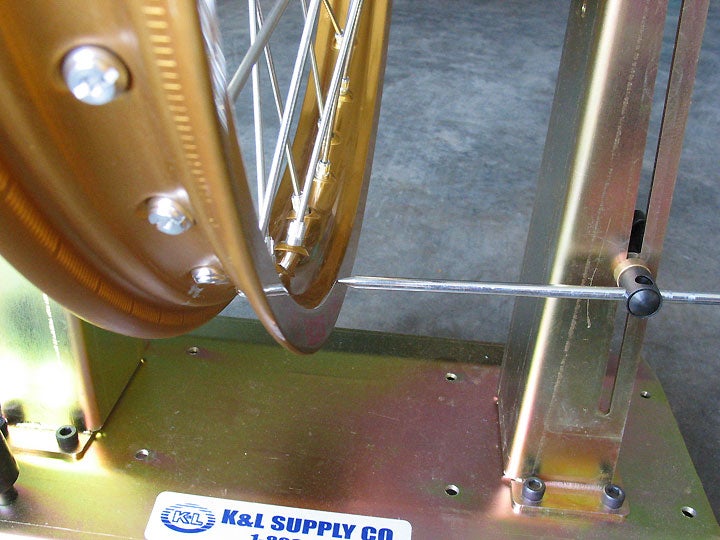
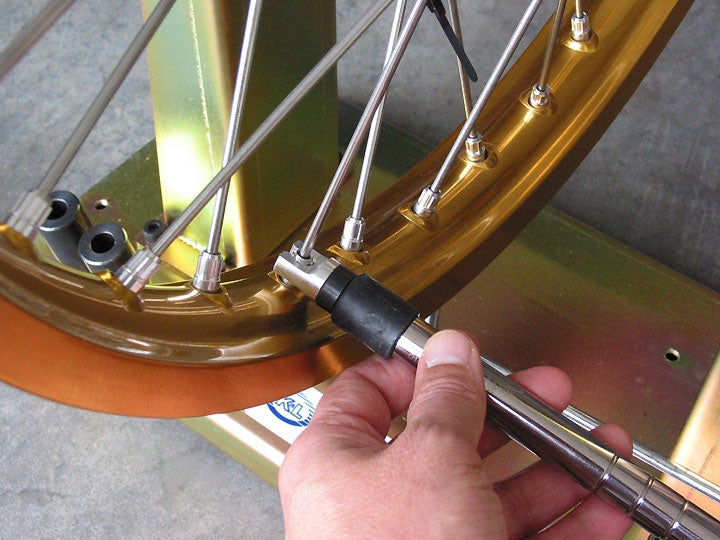
BIG NOTE: When you build a wheel, you see how a nipple screws onto its spoke the same as a nut on a bolt. The direction of rotation is obvious when you view it from the end that protrudes into the tire cavity. But, when you don’t have that vantage point, you may get the wrong idea about which direction is tighter and which is looser. So, if you are performing the following steps with your tire on the rim, MAKE SURE YOU KEEP IN MIND THAT EACH NIPPLE TIGHTENS TOWARD THE HUB, NOT THE RIM. So, facing downward on a nipple from your shop stool, you will be turning it clockwise to loosen it.
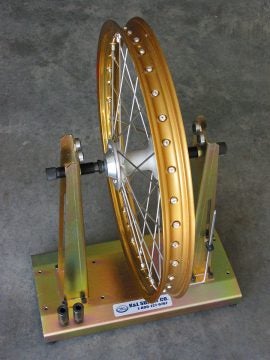
Truing: Now The Fun Begins
We’ll address north-south runout first. With your detector in position for this measurement, determine where the rim is furthest away from the hub. This will be the “high” zone if your detector is at the top of your wheel or the “low” zone if it’s at the bottom. You’ll need to tighten the spokes in that zone to pull the rim there closer to the hub. Start with a spoke in the middle of the offending zone and tighten it in a small increment, such as a half-turn. Tighten the next spoke on both sides of it slightly less, maybe a third of a turn. Tighten the next spokes away even less, perhaps a quarter-turn. Finally, tighten the next spokes out (now three spokes away from the first) an even smaller fraction of a turn. This method distributes the influence of your efforts evenly, instead of causing an acutely focused shift that is likely to create other irregularities and send you chasing your tail in an endless series of corrections.
If all the spokes are relaxed, simply tighten the first one in this series until it is just barely snug, and decrease the rotation of the spokes as you move outward among its neighbors. If you only tighten the first one a tiny amount, you might only include the next spoke on each side. Larger corrections might need to include more distant neighbors to spread the change evenly. This is the kind of thing you will develop an efficiency-boosting feel for with practice. But novices should make small adjustments, even though that may mean making many, many, many of them. It will still take far less time to do it right the first time, than to get into–and then back out of–a cycle of over-corrections.
Now recheck the north-south runout. Within your margin for error? If not, repeat the previous steps and check it again. Keep doing this until your wheel shows less radial deviation than you’ve decided to allow. (See “Enough is Enough” section below.)
Time to switch the angle of attack, although the battle tactics remain the same. Set your runout detector to check the left-right deviation and rotate your wheel to find the place where it is furthest from the axial centerline. For the sake of simplicity, we’ll call that the lateral “high” zone, and in this example you’ve found it on the right side of your rim right next to the rim lock hole. To pull it back toward the center, you’ll need to tighten the spokes on the left side in that zone. Start with the left spoke closest to the middle of the high zone, and tighten it a small amount. Proceed to its next left neighbors on both sides, and tighten them a little less. Continue to spread your influence to the outer edges of the high zone, reducing the amount of rotation as you get further away from the middle, and tightening only the spokes on the left side.
Recheck the left-right runout. Determine the new lateral high zone and make the necessary adjustment in the same way. Repeat this process until the rim has less lateral deviation than you’ve set as your standard. Note that it’s possible to make your wheel perfectly even in the left-right dimension, but with the rim centerline offset laterally to one side of the hub’s axial centerline. So, keep an eye on this during the correction process. It may help to alternate sides as you make your adjustments. In other words, you might correct a high side on the right first, and then a high side on the left (which would show up as a low side on the right). This way, you won’t be making all your adjustments toward the same side and increasing the chances of ending up with a discrepancy between the hub and rim centerlines.
For more precision in achieving this alignment of centerlines, depending on how your wheel is mounted for this operation, you may be able to flip it around in your wheelstand or take measurements on both sides from positions exactly the same distance from the hub’s centerline; a straightedge laid across the flanges might allow this. Note, however, that hubs are not necessarily symmetrical in the axial dimension (i.e. to accommodate a sprocket or rotor mount), and may be offset by spacers when mounted to position the rim at the motorcycle’s centerline, which is really what matters. The midpoint between the flanges will match the midpoint of the motorcycle. Make sure that the rim is aligned laterally within 1/16 of an inch or less.
Once the wheel runs true left-right, recheck the vertical runout. If you make adjustments north-south, recheck the lateral runout. Eventually, you’ll have a nice round wheel with most or all of its spokes holding some relatively small amount of tension. At this point, none of the spokes should be very tight. However, check each and every one to make sure none have any slack. If you find one with free play, gently tighten its nipple until it is snug against the rim.
 Your Privacy Choices